[스프링 시큐리티] 기본 인증 방식
스프링 부트에서 제공되는 기본 인증 방식에 대해 알아볼 것이다.
웹사이트에 접근할 때, 어떤 경로에 접근하느냐에 따라 접근이 허용되는 경로와 허용되지 않는 경로가 있기 마련이다.
이러한 접근 보안에 대해 알아볼 것이다.
스프링 시큐리티 기본 개념
SecurityBuilder
빌더 클래스로서 웹 보안을 구성하는 빈 객체와 설정 클래스들을 생성하는 역할을 한다.
대표적으로 WebSecurity, HttpSecurity가 있다.
SecurityConfigurer
Http 요청과 관련된 보안 처리를 담당하는 필터들을 생성하고 여러 초기화 설정에 관여한다.
이 SecurityConfigurer는 SecurityBuilder에 참조되며, 인증 및 인가 초기화 작업은 SecurityConfigurer에서 진행된다.
초기화 흐름
1. 빌더 클래스 생성
흐름
AutoConfiguration -> build() -> SecurityBuilder
작동
SecurityBuilder를 통해 HttpSecurity 생성 후 Bean 등록
2. 설정 클래스 생성
흐름
SecurityBuilder -> SecurityConfigurer
작동
1번에서 HttpSecurity가 생성되어 빈으로 등록되면, SecurityConfigurer 객체들을 자동으로 생성한다.
이렇게 생성된 SecurityConfigurer 객체는 init과 configure 메소드를 가진다. 이때, 인자는 Builder 클래스인 HttpSecurity
3. 초기화 작업 진행
흐름
SecurityBuilder -> init(B builder) / configure(B builder) -> SecurityConfigurer
작동
2번에서 생성한 설정 클래스들의 메소드(init, configure)에 빌더 클래스를 인자로 전달
이 과정에서 필터가 생성된다. 각 configurer은 하나의 필터를 가진다.
스프링 시큐리티 기본 인증
스프링 시큐리티에서는 기본적으로 제공하는 로그인 인증 방식이 존재한다.
하나의 계정을 기본적으로 제공해주며, 인증 설정에 따라 특정 페이지에 접근 시 이 로그인 과정이 필요하다.
기본 제공 계정
기본적으로 제공해주는 계정의 아이디는 user 이다.
암호는 랜덤으로 생성되는 UUID 인데, 서버가 실행될 때 콘솔창에 나타난다.
1
2
id: user<br>
pw: 랜덤 UUID
프로젝트 실행 (암호 생성)
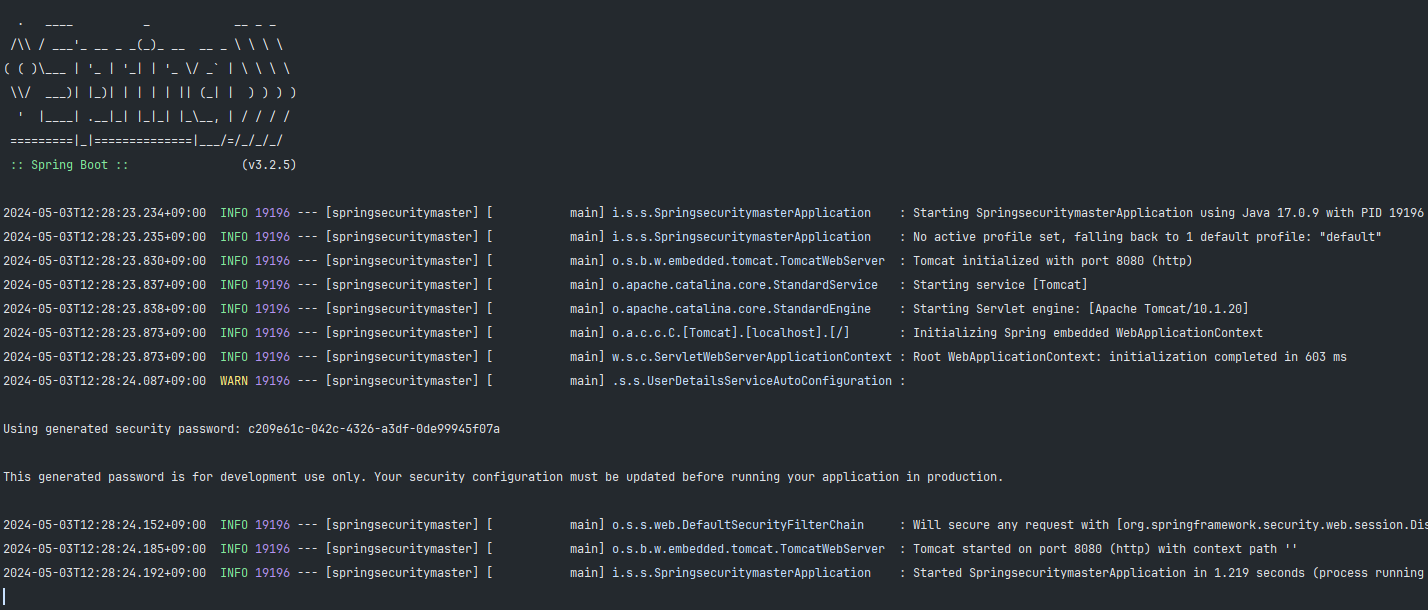
프로젝트를 실행하면 아래 이미지와 같이 하나의 암호가 생성된 것을 볼 수 있다.
이 암호는 위에서 설명한 것과 같이 처음 제공되는 계정의 비밀번호이다.
암호는 프로젝트의 매 실행마다 바뀐다.
서버의 컨트롤러에 정의한 특정 경로를 타고 들어가게되면, 아래와 같이 Spring Security에서 제공되는 로그인 폼이 렌더링된다.
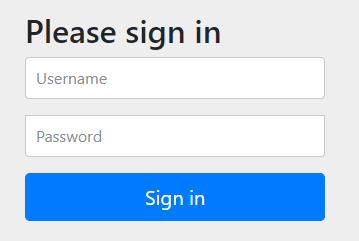
Username에는 Spring Security에서 처음 제공해주는 user를 입력하고,
Password에는 프로젝트 실행 시 제공받은 키를 입력하자.
위 내용에 따르면 Password는 c209e61c-042c-4326-a3df-0de99945f07a 이다.
결론적으로 인증이 성공하여 접근하려고 했던 경로의 페이지가 반환된다.
기본 인증 설정
요청 별 인증 설정
SpringBootWebSecurityConfiguration.java 클래스의
defaultSecurityFilterChain 메소드를 통해
SecurityFilterChain이 빈으로 등록되는 것이 시작이다.
간단히 얘기하면, defaultSecurityFilterChain 메소드는 앞에서 초기화 한 HttpSecurity 빈 객체를 인자로 받아와서,
HttpSecurity 빈 객체에 보안 설정을 적용한 후, SecurityFilterChain으로 변환하고, 이 필터체인을 빈으로 등록하여,
요청이 들어왔을 때 이 `SecurityFilterChain`을 통해 각 요청에 맞는 실제 보안이 적용되도록 하는 것이다.
요청이 들어왔을 때,
SecurityFilterChain에서 해당 요청에 맞는Configurer객체를 찾아, 해당Configurer에 정의된 설정대로 보안 처리가 이루어진다.
http.authorizeHttpRequests((requests) -> requests.anyRequest().authenticated());
이 코드를 예시로 보았을 때, authorizeHttpRequests는 http로 들어온 요청의 인증을 설정한다는 의미이며,
request.anyRequest()는 들어온 모든 요청을 의미, .authenticated()는 인증이 필요하다는 것을 의미한다.
즉 아래 코드에서는 들어온 모든 경로의 요청에 인증을 필요로 하고있다.
1
2
3
4
5
6
7
8
9
10
11
12
13
14
@Configuration(proxyBeanMethods = false)
@ConditionalOnDefaultWebSecurity
static class SecurityFilterChainConfiguration {

    @Bean
    @Order(SecurityProperties.BASIC_AUTH_ORDER)
    SecurityFilterChain defaultSecurityFilterChain(HttpSecurity http) throws Exception {
        http.authorizeHttpRequests((requests) -> requests.anyRequest().authenticated());
        http.formLogin(withDefaults());
        http.httpBasic(withDefaults());
        return http.build();
    }

}
하지만 defaultSecurityFilterChain 메소드가 실행되어 SecurityFilterChain을 빈으로 등록하기 위한 조건이 별도로 존재하며,
바로 @ConditionalOnDefaultWebSecurity 어노테이션을 통해 이 조건을 알 수 있다.
1
2
3
4
5
6
7
@Target({ ElementType.TYPE, ElementType.METHOD })
@Retention(RetentionPolicy.RUNTIME)
@Documented
@Conditional(DefaultWebSecurityCondition.class)
public @interface ConditionalOnDefaultWebSecurity {

}
이 어노테이션 안에도 @Conditional이라는 어노테이션이 존재하는데,
이 안의 DefaultWebSecurityCondition.class를 들어가서 확인해보면,
각 @ConditionalOnClass와 @ConditionalOnMissingBean를 사용하는 클래스들의 조건이 충족되어야 한다.
조건1
SecurityFilterChain.class 및 HttpSecurity.class 클래스가 Class Path에 존재하느냐?
스프링 시큐리티 의존성을 추가했다면 존재한다고 볼 수 있다.
조건2
SecurityFilterChain.class 빈이 생성되어 있지 않은가?
별도로 SecurityFilterChain.class 빈을 생성한 코드를 작성하지 않았다면, 아직 생성되지 않은 상태이다.
1
2
3
4
5
6
7
8
9
10
11
12
13
14
15
16
17
class DefaultWebSecurityCondition extends AllNestedConditions {

	DefaultWebSecurityCondition() {
		super(ConfigurationPhase.REGISTER_BEAN);
	}

	@ConditionalOnClass({ SecurityFilterChain.class, HttpSecurity.class }) // 조건 1
	static class Classes {

	}

	@ConditionalOnMissingBean({ SecurityFilterChain.class }) // 조건 2
	static class Beans {

	}

}
인증 사용자
SecurityProperties.java 클래스는 앞서 진행한 로그인과 관련된 내용을 설정하는 클래스이다.
클래스에 내장된 User 클래스를 확인하면,
name은 기본적으로 제공되는 user이며, password는 랜덤한 UUID로 되어있는 것을 확인할 수 있다.
1
2
3
4
5
6
7
8
9
10
11
12
13
14
15
16
17
18
19
20
21
22
23
24
25
26
27
28
29
30
31
32
33
34
35
36
37
38
39
40
41
42
43
44
45
46
47
48
49
50
51
52
public static class User {

    /**
     * Default user name.
     */
    private String name = "user";

    /**
     * Password for the default user name.
     */
    private String password = UUID.randomUUID().toString();

    /**
     * Granted roles for the default user name.
     */
    private List<String> roles = new ArrayList<>();

    private boolean passwordGenerated = true;

    public String getName() {
        return this.name;
    }

    public void setName(String name) {
        this.name = name;
    }

    public String getPassword() {
        return this.password;
    }

    public void setPassword(String password) {
        if (!StringUtils.hasLength(password)) {
            return;
        }
        this.passwordGenerated = false;
        this.password = password;
    }

    public List<String> getRoles() {
        return this.roles;
    }

    public void setRoles(List<String> roles) {
        this.roles = new ArrayList<>(roles);
    }

    public boolean isPasswordGenerated() {
        return this.passwordGenerated;
    }

}
DB 연동 없이 어떻게 비교하는가?
지금까지 DB연동도 없이 어떻게 인증이 이루어지는지 궁금했다.
Spring Security는 새로운 유저가 발생했을 때, 메모리에 저장하는 과정을 거친다.
SecurityProperties 클래스의 User 또한 프로젝트가 실행하면서 메모리에 저장되고,
로그인을 시도할 때, 메모리의 데이터와 비교하여 인증이 가능한 것이다.
그렇다면 초기 계정은 어떻게 메모리에 저장되는가?
UserDetailsServiceAutoConfiguration 클래스를 확인하면 알 수 있다.
1
2
3
4
5
6
7
8
9
10
@Bean
public InMemoryUserDetailsManager inMemoryUserDetailsManager(SecurityProperties properties,
        ObjectProvider<PasswordEncoder> passwordEncoder) {
    SecurityProperties.User user = properties.getUser();
    List<String> roles = user.getRoles();
    return new InMemoryUserDetailsManager(User.withUsername(user.getName())
        .password(getOrDeducePassword(user, passwordEncoder.getIfAvailable()))
        .roles(StringUtils.toStringArray(roles))
        .build());
}
SecurityProperties 클래스에 내장된 User 클래스를 가져온 뒤,
getName()과 getPassword() 및 getRoles()를 사용하여
이 User의 정보를 담은 InMemoryUserDetailsManager 클래스를 초기화하고,
이 클래스가 빈으로 등록되면서 스프링 컨테이너에 의해 관리되는 형식이다.
추가되는 User들도 이 InMemoryUserDetailsManager에 등록된다.